👌 Note: Skip to the next section if you already have a VM set up
Note: The following section requires you already have a Google Cloud Platform account associated with an active Billing account.
-
Go to console.cloud.google.com > > Compute Engine > VM instances > Create instance
-
Name it
lewagon-data-eng-vm-<github_username>, replace<github_username>with your own, e.g.krokrob -
Region
europe-west1, choose the closest one among the available regions -
In the section
Machine configurationunder the sub-headingMachine type -
Select General purpose > PRESET > e2-standard-4
-
Boot disk > Change
-
Operating system > Ubuntu
-
Version > Ubuntu 22.04 LTS x86/64
-
Boot disk type > Balanced persistent disk
-
Size > upgrade to 150GB
-
-
Open
Networking, Disks, ...underAdvanced options -
Open
Networking -
Go to
Network interfacesand click ondefault default (...)with a downward arrow on the right. -
This opened a box
Edit network interface -
Go to the dropdown
External IPv4 address, click on it, click onRESERVE STATIC EXTERNAL IP ADDRESS -
Give it a name, like "lewagon-data-eng-vm-ip-<github_username>" (replace
<github_username>with your own) and description "Le Wagon - Data Engineering VM IP". This will take a few seconds. -
You will now have a public IP associated with your account, and later to your VM instance. Click on
Doneat the bottom of the sectionEdit network interfaceyou were in.

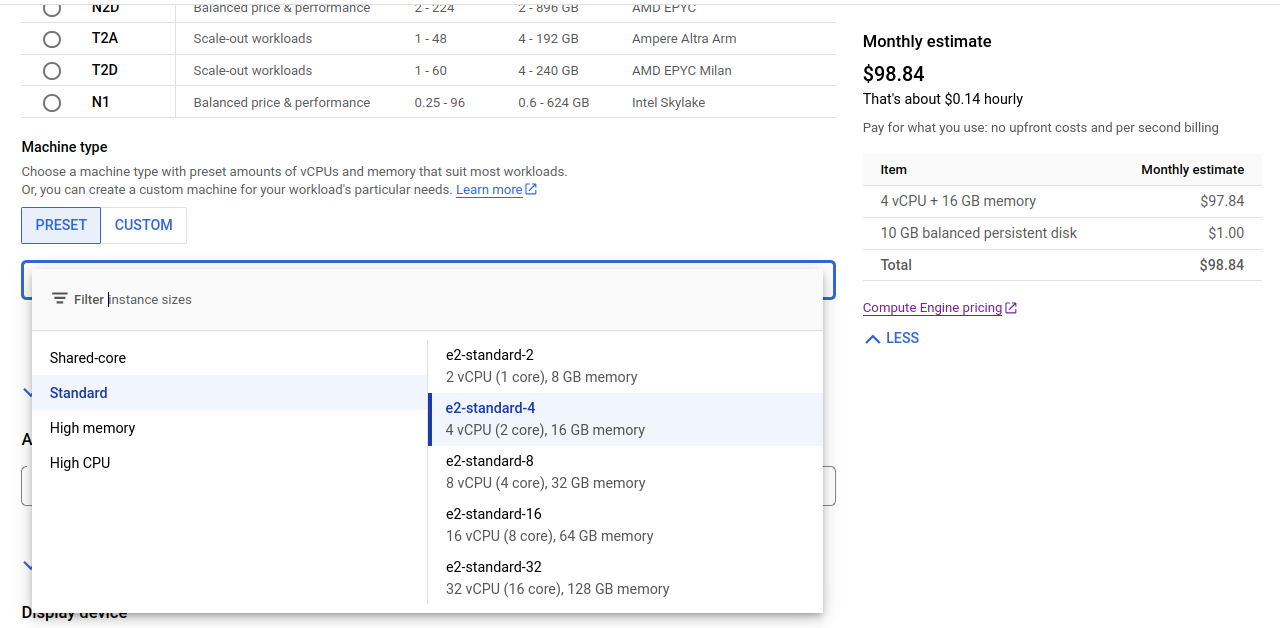


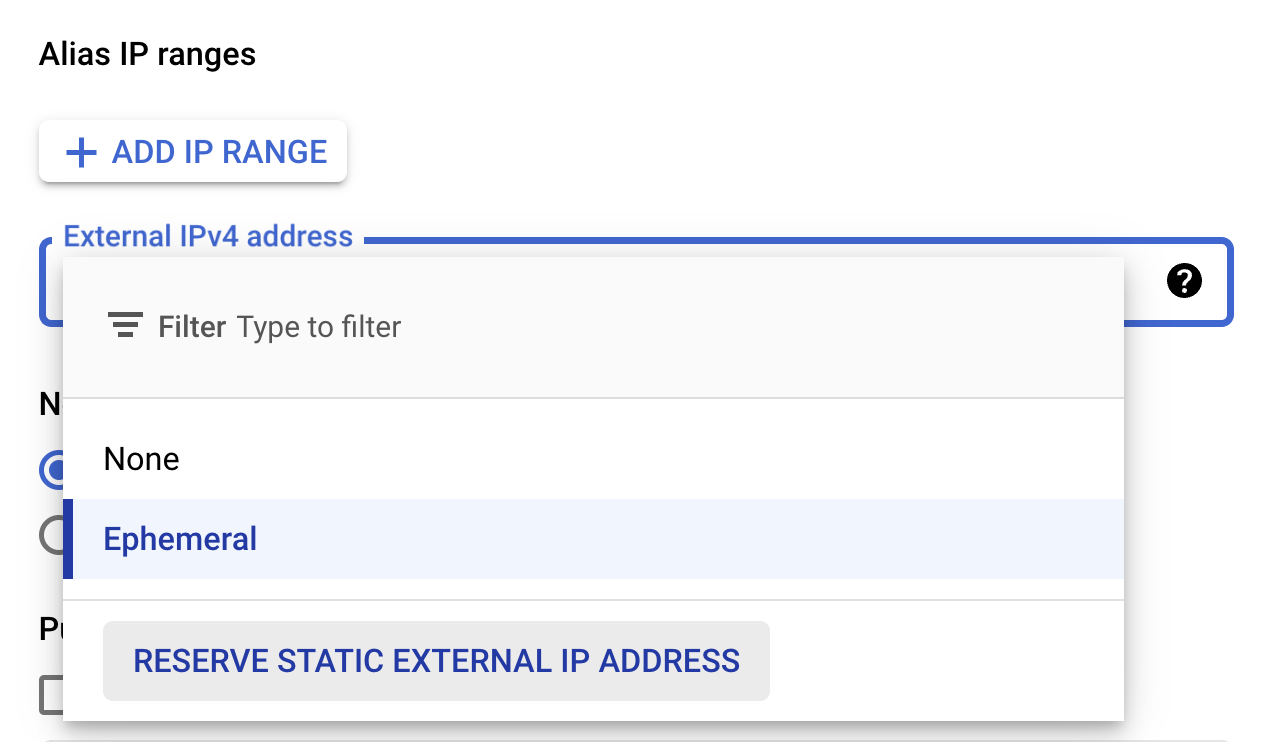


-
Open the
Securitysection -
Open the
Manage accesssubsection -
Go to
Add manually generated SSH keysand clickAdd item -
In your terminal display your public SSH key:
-
Windows:
# If you use Windows Terminal
more $HOME\.ssh\de-bootcamp.pub
# OR if you use Command Prompt:
# more %HOMEPATH%\.ssh\de-bootcamp.pub
-
Mac/Linux users can use:
cat ~/.ssh/de-bootcamp.pub
-
-
Copy your public SSH key and paste it:
-
On the right hand side you should see
-
You should be good to go and click
CREATEat the bottom -
It will take a few minutes for your virtual machine (VM) to be created. Your instance will show up like below when ready, with a green circled tick, named
lewagon-data-eng-vm-krokrob(krokrobbeing replaced by your GitHub username). -
Click on your instance
-
Go down to the section
SSH keys, and write down your username (you need it for the next section)


Congrats, your virtual machine is up and running, it is time to connect it with VS Code!